
 This vintage sign has been one of my easiest DIY’s to
date. I’d been holding onto a
lovely piece of driftwood since I went driftwood hunting for my DIY Jewelry Holder. I finally got around to making something of my piece of wood, and
it turned out to be such a simple project. As easy as it was, I was very
pleased with my finished product. This vintage sign will be perfect for a small
wall in my apartment.
This vintage sign has been one of my easiest DIY’s to
date. I’d been holding onto a
lovely piece of driftwood since I went driftwood hunting for my DIY Jewelry Holder. I finally got around to making something of my piece of wood, and
it turned out to be such a simple project. As easy as it was, I was very
pleased with my finished product. This vintage sign will be perfect for a small
wall in my apartment.
Supplies needed
a piece of driftwood
your choice color of acrylic paint (mine is a peachy/coral
color)
a pencil
a paintbrush
an old strand of fake pearls
a thicker strand of raffia
a staple gun
a glue gun
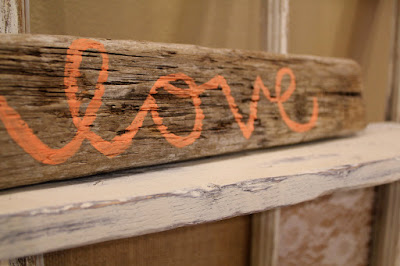
I stuck with the simple and slightly cliché ‘Love’ for my
sign, because I needed a short word, and hey- we all need a little love,
right? I traced out the word with a pencil before I painted it with a
paintbrush.
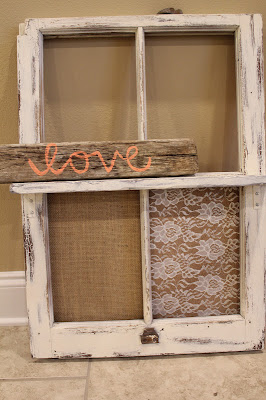
I initially planned on leaving my sign as it was and simply setting it somewhere (isn’t it lovely on my DIY Window Frame Shelf?),
but I decided I wanted to hang it.
I cut my strand of pearls and raffia the length I wanted the
hanging part to be. Then, I tied my raffia to my strand of pearls with a tight
knot on each side.

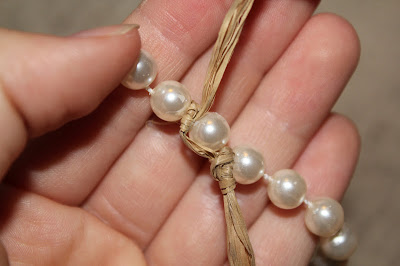
At first, I was planning on just twisting the pearls and
raffia together, but the strands weren’t staying lined up how I wanted them.
So, I twisted one section of raffia around the pearls and glued it with hot
glue, and so on and so on down my strand of pearls.


Next, I got out
my staple gun and stapled the very end of the raffia to the back of the
driftwood, on each side. I tried to measure the distance from each side of the
wood to make sure my sign would hang evenly. And okay -- I got a little paranoid and may have exploded hot glue everywhere on the back to make sure my raffia-pearls hanger would hold.


And here is my finished product!


-A


