Thursday, September 20, 2012

DIY Headboard


I know I’ve been MIA for a while, but don’t you worry -- I’ve left time for a little crafting here and there. My most recent project was building a headboard for my bed. I was surprised at how easy this project turned out to be.  I found an old attic door at a local “vintique” store in Knoxville. This DIY would easily work with any old door, depending on your bed size. I’ll admit, my attic door is a bit small for my queen-sized bed, but I just couldn’t pass up this charming old white door.
Supplies:
-an old wooden door
-a tape measure
-two 2x4's to serve as posts for your headboard **You’ll need to measure the height of your bed and door (height of door when laying horizontally, that is) to figure out what size pieces of wood to buy.
-a drill
-12 wood screws, long enough to drill through your wood slats and half of your door

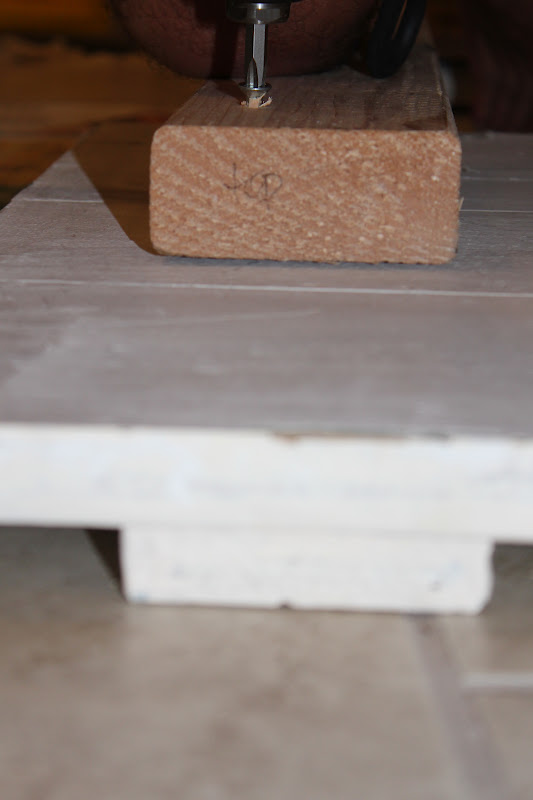
First off, make sure your 2x4's are flat on the bottom, so that they will stand up level on the ground. Now lay your door face down on the ground (so that the back is facing up), and line up where you will connect your 2x4's. You are essentially just attaching the wooden posts to the back of your door to act as legs. It’s a good idea to have the wood run almost to the top of your door for added support. Most importantly, align your wood so that the legs match the height of your bed (so your wooden legs won’t be visible). I used a tape measure to do this, and I drew a line where the wood should align with the edge of the door.

Once you’ve lined the wood up how you want it, secure your legs by drilling 6 screws into each post. Place two screws at the top of your slat, two in the middle, and two at the bottom.


Flip your door over, stand it up, and you’ve got yourself a new headboard!

 It may be a good idea to paint the top of your wooden legs the same color as your door, just in case an inch or two shows when you forget to make your bed! My door was a vintage white color, and I happened to have extra spray paint leftover from my window frame shelf. So, I just spray painted the top half of my legs, and now I never have to fret about raw wood peeking out. Here’s my finished product. I simply stood it up against the wall and pushed my bed up against it.

P.S.  Recognize those lamps on a string? They finally found a home above my bed!
-A

Monday, August 13, 2012

DIY Vintage Sign

This vintage sign has been one of my easiest DIY’s to date.  I’d been holding onto a lovely piece of driftwood since I went driftwood hunting for my DIY Jewelry Holder. I finally got around to making something of my piece of wood, and it turned out to be such a simple project. As easy as it was, I was very pleased with my finished product. This vintage sign will be perfect for a small wall in my apartment.

Supplies needed
a piece of driftwood
your choice color of acrylic paint (mine is a peachy/coral color)
a pencil
a paintbrush
an old strand of fake pearls
a thicker strand of raffia
a staple gun
a glue gun

I stuck with the simple and slightly cliché ‘Love’ for my sign, because I needed a short word, and hey- we all need a little love, right? I traced out the word with a pencil before I painted it with a paintbrush.
I initially planned on leaving my sign as it was and simply setting it somewhere (isn’t it lovely on my DIY Window Frame Shelf?), but I decided I wanted to hang it.
I cut my strand of pearls and raffia the length I wanted the hanging part to be. Then, I tied my raffia to my strand of pearls with a tight knot on each side.
At first, I was planning on just twisting the pearls and raffia together, but the strands weren’t staying lined up how I wanted them. So, I twisted one section of raffia around the pearls and glued it with hot glue, and so on and so on down my strand of pearls.
 Next, I got out my staple gun and stapled the very end of the raffia to the back of the driftwood, on each side. I tried to measure the distance from each side of the wood to make sure my sign would hang evenly. And okay -- I got a little paranoid and may have exploded hot glue everywhere on the back to make sure my raffia-pearls hanger would hold.
And here is my finished product! 


-A

Friday, August 3, 2012

DIY Mason Jar Luminaries

Yet again I bring you a project featuring shabby chic staples: burlap and lace!

A couple weeks ago, I bought two small shelves at an antique store, and I’ve been looking for something to set on them. I’ve got an abundance of mason jars laying around and of course some leftover burlap and lace from my Lamps on a String. So, I put the three together and made these babies! These would be cute for an outdoor event like a wedding reception; they’re romantic yet rustic. Or, you could use them as decoration on a table or shelf- like me! And, let me add, they are so easy. They probably took me 30 minutes total.

Supplies Needed:
mason jar/jars- mine were $1 each from the Dollar Store
lace fabric
burlap
twine or any sort of ribbon
glue (I used Elmer’s Craft Bond Multi-Purpose Spray Adhesive)
scissors
tea light/lights

Cut out lace to wrap around the base of your mason jar.
Spray one side of your jar and attach your lace. Keep spraying and attaching piece by piece until your ends of lace meet. Press down the edges to ensure they will lay down flat.
Now cut a strip of burlap the size of your rim. Spray your rim with glue and attach the burlap. I cut my burlap a little big and cut the extra off the top after I glued.
Tie your twine around the rim, and stick a tea light in. And viola! Your own mason jar luminaries.

 -A

Tuesday, July 31, 2012

Mint Madness

I’m obsessed with the color mint green. Like it. Love it. Gotta have it. (Cold Stone Creamery reference, anyone?) So, I have a whole can of mint green paint left from my DIY vintage nightstand, and I’ve been painting everything in sight. I thought I’d share a few of my most recent projects.
First off, I recently found this small wooden ladder from a garage sale for $2! ( If you wanted to imitate this DIY, I did a little searching and found a similar ladder on Ebay for $11.24.)
 I painted the ladder with my lovely mint paint and distressed it with sandpaper. My paint is Walmart interior flat Norwegian Vintage Green. I plan to lean this against the wall in my bathroom and hang washcloths & hand towels on it.

Secondly, I distressed an old wooden frame and added some mint accents. I simply sanded the edges and crevices of the frame, dusted it off, and painted accents of mint (I used the same paint used above but acrylic paint would work for this too). To achieve the distressed look, make sure there is NOT much paint on your paintbrush. I used a paper towel to dab up excess paint or rub areas where paint went on too thick!
Lastly, I painted a cheap vase from the Dollar Store using a method I saw on pinterest. All you do is drip some paint inside your vase, and tilt your vase around to cover the inside. To fill in all the holes, just set your vase upside down and leave it to drip and dry. I touched up a few places on the top of mine after it had dried. I imagine acrylic paint would work just as well or better than the paint I used. I love the subtle mint with some bright flowers.
And that sums up my dose of mint for the day! 

-A

Friday, July 27, 2012

DIY Vintage Dresser


I’ve spent the past few days searching through just about every thrift store in Knoxville looking for an old dresser to re-do. Unfortunately, I just never found one that I loved. I knew I had a cheap Target dresser stored somewhere, but, being that it’s made out of cheap wood and particle wood, I thought there was no way I could re-do it. Well, it wasn’t until I ran out of thrift stores that I turned to my storage closet. I pulled the dresser out to see what I could possibly make of it. After some brainstorming and some suggestions, I came up with a plan. I was so pleasantly surprised with my end product that I had to share! The neat thing about this furniture tutorial is that you could probably find almost the exact dresser at Target or Walmart.

Materials Needed:
a dresser
enough slats of wood to cover the top of your dresser (mine took 7 pieces of 2.5x33” wood)
power saw
wood screws
drill
wood stain & a paint brush (my stain is Minwax Weathered Oak 270)
tape
knobs of your choice
medium grit and fine grit sandpaper

Measure the top of your dresser and determine how you need to cut your wood to fit it.
Mark your pieces of wood and cut them with your power saw.
It may seem like you could lay your pieces on your dresser in any order, but there is actually a little strategy to it. Try different pieces of wood in different places, and eventually they should sort of fit together. Mark tiny numbers on each piece so you know where they go.
Sand each piece of wood with medium grit sandpaper followed by fine grit sandpaper. Wipe down each piece of wood with a wet paper towel.
Starting at one end of your dresser, place your first piece of wood down. Firmly hold it in place and drill a small pilot hole in one side. Now, screw in a wood screw. Drill a hole in the other side and in the middle, and screw your wood screws in those holes too.  Follow this procedure for each piece of wood, making sure your screws are aligned. Some of my pieces of wood were warped, so I had someone push my piece of wood against the dresser as I screwed it in to prevent a bumpy surface.
After your pieces of wood are all attached, tape the dresser directly under your wood.
Paint a layer of stain on your wood and wait 15 minutes. Now, wipe your wood with a rag. Let your stain sit for 4-6 hours.
While your stain is drying, you can change out your knobs! I found mine at Home Depot for $1.20 each.
After your knobs are in, sand the corners and edges of your dresser. I did most of my distressing on my drawers, because they were the best quality wood, and thus, easiest to sand down.
After 4-6 hours have passed, you can decide whether you want to add another layer of stain or not. If so, just repeat the same process as earlier. (I did 3 layers of stain on mine.) 
Let all that stain dry, and there you are -- your vintage dresser is complete! It hardly looks like the same piece of furniture if you ask me. :)


-A