Showing posts with label vintage. Show all posts

Thursday, September 20, 2012

DIY Headboard


I know I’ve been MIA for a while, but don’t you worry -- I’ve left time for a little crafting here and there. My most recent project was building a headboard for my bed. I was surprised at how easy this project turned out to be.  I found an old attic door at a local “vintique” store in Knoxville. This DIY would easily work with any old door, depending on your bed size. I’ll admit, my attic door is a bit small for my queen-sized bed, but I just couldn’t pass up this charming old white door.
Supplies:
-an old wooden door
-a tape measure
-two 2x4's to serve as posts for your headboard **You’ll need to measure the height of your bed and door (height of door when laying horizontally, that is) to figure out what size pieces of wood to buy.
-a drill
-12 wood screws, long enough to drill through your wood slats and half of your door

First off, make sure your 2x4's are flat on the bottom, so that they will stand up level on the ground. Now lay your door face down on the ground (so that the back is facing up), and line up where you will connect your 2x4's. You are essentially just attaching the wooden posts to the back of your door to act as legs. It’s a good idea to have the wood run almost to the top of your door for added support. Most importantly, align your wood so that the legs match the height of your bed (so your wooden legs won’t be visible). I used a tape measure to do this, and I drew a line where the wood should align with the edge of the door.

Once you’ve lined the wood up how you want it, secure your legs by drilling 6 screws into each post. Place two screws at the top of your slat, two in the middle, and two at the bottom.


Flip your door over, stand it up, and you’ve got yourself a new headboard!

 It may be a good idea to paint the top of your wooden legs the same color as your door, just in case an inch or two shows when you forget to make your bed! My door was a vintage white color, and I happened to have extra spray paint leftover from my window frame shelf. So, I just spray painted the top half of my legs, and now I never have to fret about raw wood peeking out. Here’s my finished product. I simply stood it up against the wall and pushed my bed up against it.

P.S.  Recognize those lamps on a string? They finally found a home above my bed!
-A

Monday, August 13, 2012

DIY Vintage Sign

This vintage sign has been one of my easiest DIY’s to date.  I’d been holding onto a lovely piece of driftwood since I went driftwood hunting for my DIY Jewelry Holder. I finally got around to making something of my piece of wood, and it turned out to be such a simple project. As easy as it was, I was very pleased with my finished product. This vintage sign will be perfect for a small wall in my apartment.

Supplies needed
a piece of driftwood
your choice color of acrylic paint (mine is a peachy/coral color)
a pencil
a paintbrush
an old strand of fake pearls
a thicker strand of raffia
a staple gun
a glue gun

I stuck with the simple and slightly cliché ‘Love’ for my sign, because I needed a short word, and hey- we all need a little love, right? I traced out the word with a pencil before I painted it with a paintbrush.
I initially planned on leaving my sign as it was and simply setting it somewhere (isn’t it lovely on my DIY Window Frame Shelf?), but I decided I wanted to hang it.
I cut my strand of pearls and raffia the length I wanted the hanging part to be. Then, I tied my raffia to my strand of pearls with a tight knot on each side.
At first, I was planning on just twisting the pearls and raffia together, but the strands weren’t staying lined up how I wanted them. So, I twisted one section of raffia around the pearls and glued it with hot glue, and so on and so on down my strand of pearls.
 Next, I got out my staple gun and stapled the very end of the raffia to the back of the driftwood, on each side. I tried to measure the distance from each side of the wood to make sure my sign would hang evenly. And okay -- I got a little paranoid and may have exploded hot glue everywhere on the back to make sure my raffia-pearls hanger would hold.
And here is my finished product! 


-A

Friday, July 27, 2012

DIY Vintage Dresser


I’ve spent the past few days searching through just about every thrift store in Knoxville looking for an old dresser to re-do. Unfortunately, I just never found one that I loved. I knew I had a cheap Target dresser stored somewhere, but, being that it’s made out of cheap wood and particle wood, I thought there was no way I could re-do it. Well, it wasn’t until I ran out of thrift stores that I turned to my storage closet. I pulled the dresser out to see what I could possibly make of it. After some brainstorming and some suggestions, I came up with a plan. I was so pleasantly surprised with my end product that I had to share! The neat thing about this furniture tutorial is that you could probably find almost the exact dresser at Target or Walmart.

Materials Needed:
a dresser
enough slats of wood to cover the top of your dresser (mine took 7 pieces of 2.5x33” wood)
power saw
wood screws
drill
wood stain & a paint brush (my stain is Minwax Weathered Oak 270)
tape
knobs of your choice
medium grit and fine grit sandpaper

Measure the top of your dresser and determine how you need to cut your wood to fit it.
Mark your pieces of wood and cut them with your power saw.
It may seem like you could lay your pieces on your dresser in any order, but there is actually a little strategy to it. Try different pieces of wood in different places, and eventually they should sort of fit together. Mark tiny numbers on each piece so you know where they go.
Sand each piece of wood with medium grit sandpaper followed by fine grit sandpaper. Wipe down each piece of wood with a wet paper towel.
Starting at one end of your dresser, place your first piece of wood down. Firmly hold it in place and drill a small pilot hole in one side. Now, screw in a wood screw. Drill a hole in the other side and in the middle, and screw your wood screws in those holes too.  Follow this procedure for each piece of wood, making sure your screws are aligned. Some of my pieces of wood were warped, so I had someone push my piece of wood against the dresser as I screwed it in to prevent a bumpy surface.
After your pieces of wood are all attached, tape the dresser directly under your wood.
Paint a layer of stain on your wood and wait 15 minutes. Now, wipe your wood with a rag. Let your stain sit for 4-6 hours.
While your stain is drying, you can change out your knobs! I found mine at Home Depot for $1.20 each.
After your knobs are in, sand the corners and edges of your dresser. I did most of my distressing on my drawers, because they were the best quality wood, and thus, easiest to sand down.
After 4-6 hours have passed, you can decide whether you want to add another layer of stain or not. If so, just repeat the same process as earlier. (I did 3 layers of stain on mine.) 
Let all that stain dry, and there you are -- your vintage dresser is complete! It hardly looks like the same piece of furniture if you ask me. :)


-A

Wednesday, July 18, 2012

DIY Vintage Window Frame Shelf


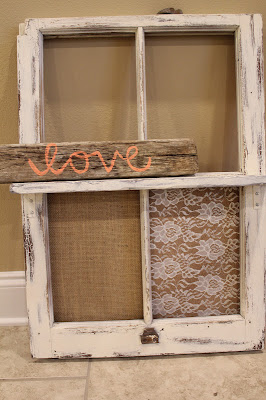
I recently bought an old window frame from an antique thrift store, and I had been contemplating what to do with it. I picked up two of my favorite fabrics- burlap and lace- and got to work. I ended up covering corkboard in my fabrics for the bottom two squares and creating a shelf for the upper two. I had to completely re-do my window frame and create a shelf that matched, so this DIY requires a few steps. But...the finished product is SO worth it!
Supplies Needed:
an old window frame
an old rag
spray paint of your choice (mine is called ‘heirloom white’)
sandpaper
painter’s tape (if you’ll need to cover any hardware)
corkboard to cover your bottom 2 squares (I bought a 12x24" roll at Hobby Lobby for $4.99)
measuring tape
a square of lace to cover one square
a square of burlap to cover one square
a large piece of cardboard (I used an old box)
fabric glue (I used Elmer’s Craft Bond Multi-Purpose Spray Adhesive)
a staple gun
a pencil
Two 2" L brackets and 8 screws
a power drill (you could use a plain screwdriver)
a level (unless you’ve got a really good eye!)

(***The next few supplies could be omitted if you already had a piece of distressed wood that would work for your shelf. In my case, I had to create one….)

*a piece of wood for your shelf (I got a 10 ft. 1x4" of oak at Home Depot for less than $2)
*a power saw (or a normal saw- unless your wood is the exact length!)
*apple cider vinegar
*a piece or 2 of steel wool (0-2 grade works nice)
*random tools to beat your piece of wood (hammer, screwdriver, etc)

(*If you’re creating your own distressed wood for the shelf, go ahead and place your steel wool in a bowl of apple cider vinegar to be soaking).
Wipe down your window with an old wet rag, removing excess dust or dirt.
Sand your window using medium grit sandpaper followed by fine grit sandpaper.
Wipe down window again with a wet rag followed by a dry one. Allow window to dry.
Tape off any hardware you don’t want painted on your window. Spray paint entire window with an even coat. Allow window to dry.
While you’re waiting, you can spray paint your L brackets the same color. I hung mine on dental floss to spray them- ha!
Rub edges, corners, and any other places you wish to look distressed with medium grit sandpaper until you’ve achieved your ideal distressed look.
Now measure the bottom two squares of your window, and cut your corkboard.  I made my corkboard squares about a ½ inch wider than the actual window squares. Be careful cutting the corkboard- it will break!
Cut a square of lace and a square of burlap to cover your corkboard. Make sure and leave about an inch and a half on each side to wrap around the back of the corkboard.
Spray one piece of corkboard with fabric glue and attach the lace. I used my bottle of fabric glue as a rolling pin to flatten my fabric to the corkboard. Attach your burlap on the other piece of corkboard.
Flip both pieces of corkboard over on their backs. Spraying each side with fabric glue one at a time, fold your fabric over and attach them so that all edges are covered.
Now cut a piece of cardboard that is the exact size of the bottom half of your window (from the middle window pane down). You’re going to attach your corkboard squares to this cardboard.
Place the window on top of your cardboard and mark where your corkboard squares need to go with a pencil/pen.
Slide your cardboard out from under your window, and attach your corkboard squares using fabric glue.
Now place your cardboard back under the window, making sure your new corkboard squares are lined up. Carefully hold your cardboard in place and flip the window over, so its back is facing up. Using a staple gun, staple the cardboard to the edges of your frame.
***Next are the steps for creating your distressed wood shelf, so skip these if you already have a piece of distressed wood!

Measure the width of your window where you want your shelf to go. Using a power saw, cut your piece of wood the length of your window.
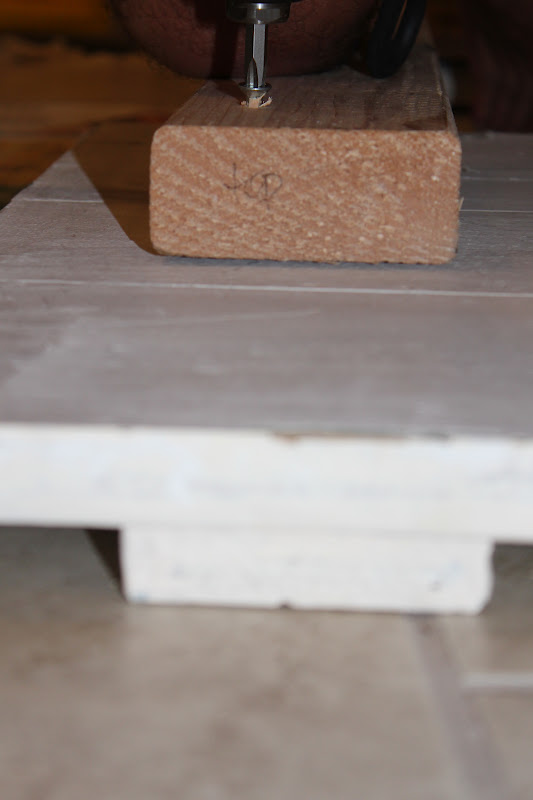
Take your piece of wood outside with a few random tools, and have at it! Beat it up, so it looks nice and old. Below are some strategies I used to distress mine.
Sand the piece of wood to make the new rough spots even. Dust the wood off with a rag.
Now, take the pieces of steel wool that have been soaking in apple cider vinegar, and wipe down your piece of wood. Scrub the vinegar into the wood as best you can. I did this for about 10 minutes.
Let the piece of wood dry (for an hour or two). You’ll notice it turns dark, looking nice and vintage!
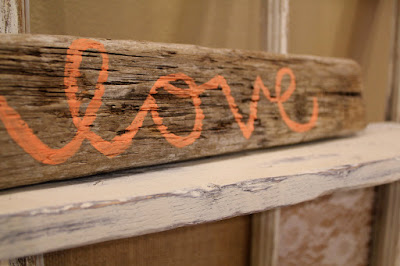
Spray paint the piece of wood with the same paint used for your window. Let it dry. Similar to how you distressed your window with sandpaper, distress the wood. Dust it off, and it’s ready to attach!
Take your piece of distressed wood, and line it up on your window frame. Use a level to make sure it’s flat.
 Hold your L brackets under the piece of wood and make a mark in each hole with a pencil (4 will be on your piece of wood, and 4 will be on your window). You might need an extra pair of hands for this part!
(If you have a power drill) Using a small drill bit, create pilot holes for your screws.
Using a power drill or screwdriver, screw your L brackets into the PIECE OF WOOD FIRST.
Then, screw the L brackets into your frame.
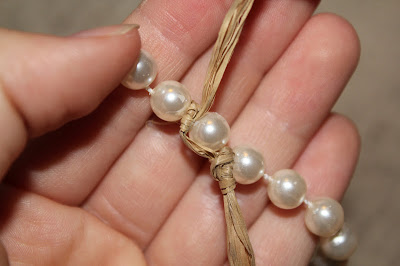
And- voila! A vintage window frame shelf of your own! I placed my newly made mason jar craft on mine!

-A

P.S. if you like this DIY, you might like my matching DIY Vintage Dresser or my DIY Mint Vintage Nightstand!